

Afterthought Buttonholes (no cut)
I’m the type of person who wears a cardigan open 90% of the time. So, when it comes to buttonholes on personal projects… it’s 50/50 if I bother to actually put them in! I’ve always worked one of the regular methods of placing buttonholes, but with my most recent design, I had the unfortunate situation where I didn’t love the way it worked in my 2x2 ribbing. Either the buttonhole would end up looking lopsided (to me) or else I would end up with a buttonhole that was too big. Enter, the afterthought buttonhole.
When looking up tutorials for this technique, I encountered the fact that Elizabeth Zimmerman’s version of this involved cutting your knitting! No thank you… At least, not if I can avoid it! Well, here’s an option for a no-cut afterthought buttonhole that I hope you like.
Materials Needed:
Your project
Crochet hook (roughly similar to your needle size or smaller)
Tapestry needle
Scrap yarn or thread in matching color in a 15-20”/[38-40cm] length.
Removable stitch markers
If your pattern has directions on placing buttonholes, mark these sts with removable st markers to revisit them later. If it does not, figure out your ideal placement and mark them with buttonholes. My suggestion here is to take the overall length you will have your buttons across (let’s say this is 10”) and divide it by how many buttons you will be using (let’s say this is 5). 10/5=2. So, this means in every 2” zone there will be a button somewhere in that zone. Now, in the bottom-most “zone” figure out where you’d like to place your button. I’d suggest about halfway between the zone, so about 1” up. However, definitely eyeball this with your actual button b/c this may vary based on button size and shape. Then you can mark that spot with a removable st marker, measure 2” up, place another st marker, etc until you’ve marked the top spot. Make sure you are happy with the placement of these, and if you need to make slight adjustments, go ahead. (A cheat for this is to use a button placement tool which is more commonly used for sewing. Mark the top and bottom and stretch the tool to fit. See pic below.)

Now that you know where you’d like the buttonholes to be, flip your work over to the back side (WS). It will be easier to see where to place if you shift your removeable st marker to the back side, as well. Now to begin the steps of creating your buttonholes. The pictures here are similar to the video, in that the back side of the work appears as purl sts. Below this will be pictures to demo in case you need to work your buttonhole(s) on knit sts.
Working Buttonholes when the sts appear as Purl Sts (on the WS)

Step 1: find where you would like your buttonhole to be. In the above pic, the st marker is marking an actual st. I decided to put my buttonhole between sts, so I will be working into the space next to the st marker. Place your crochet hook into the place you would like your buttonhole to be. This can be in a st itself (good option if you’re working in 1x1 ribbing) or between sts (what I am showing in the video above). Give your crochet hook a good pull back and forth to make that space larger. This will get your buttonhole started.

Step 2: pick a direction from the hole you created. In the pic above, I picked towards the edge of the buttonband. Place your crochet hook under the first 2 sts. Pull the further/2nd st under the closer/1st st. This is a similar motion as if you were laddering a dropped st back up. This is the pic below.


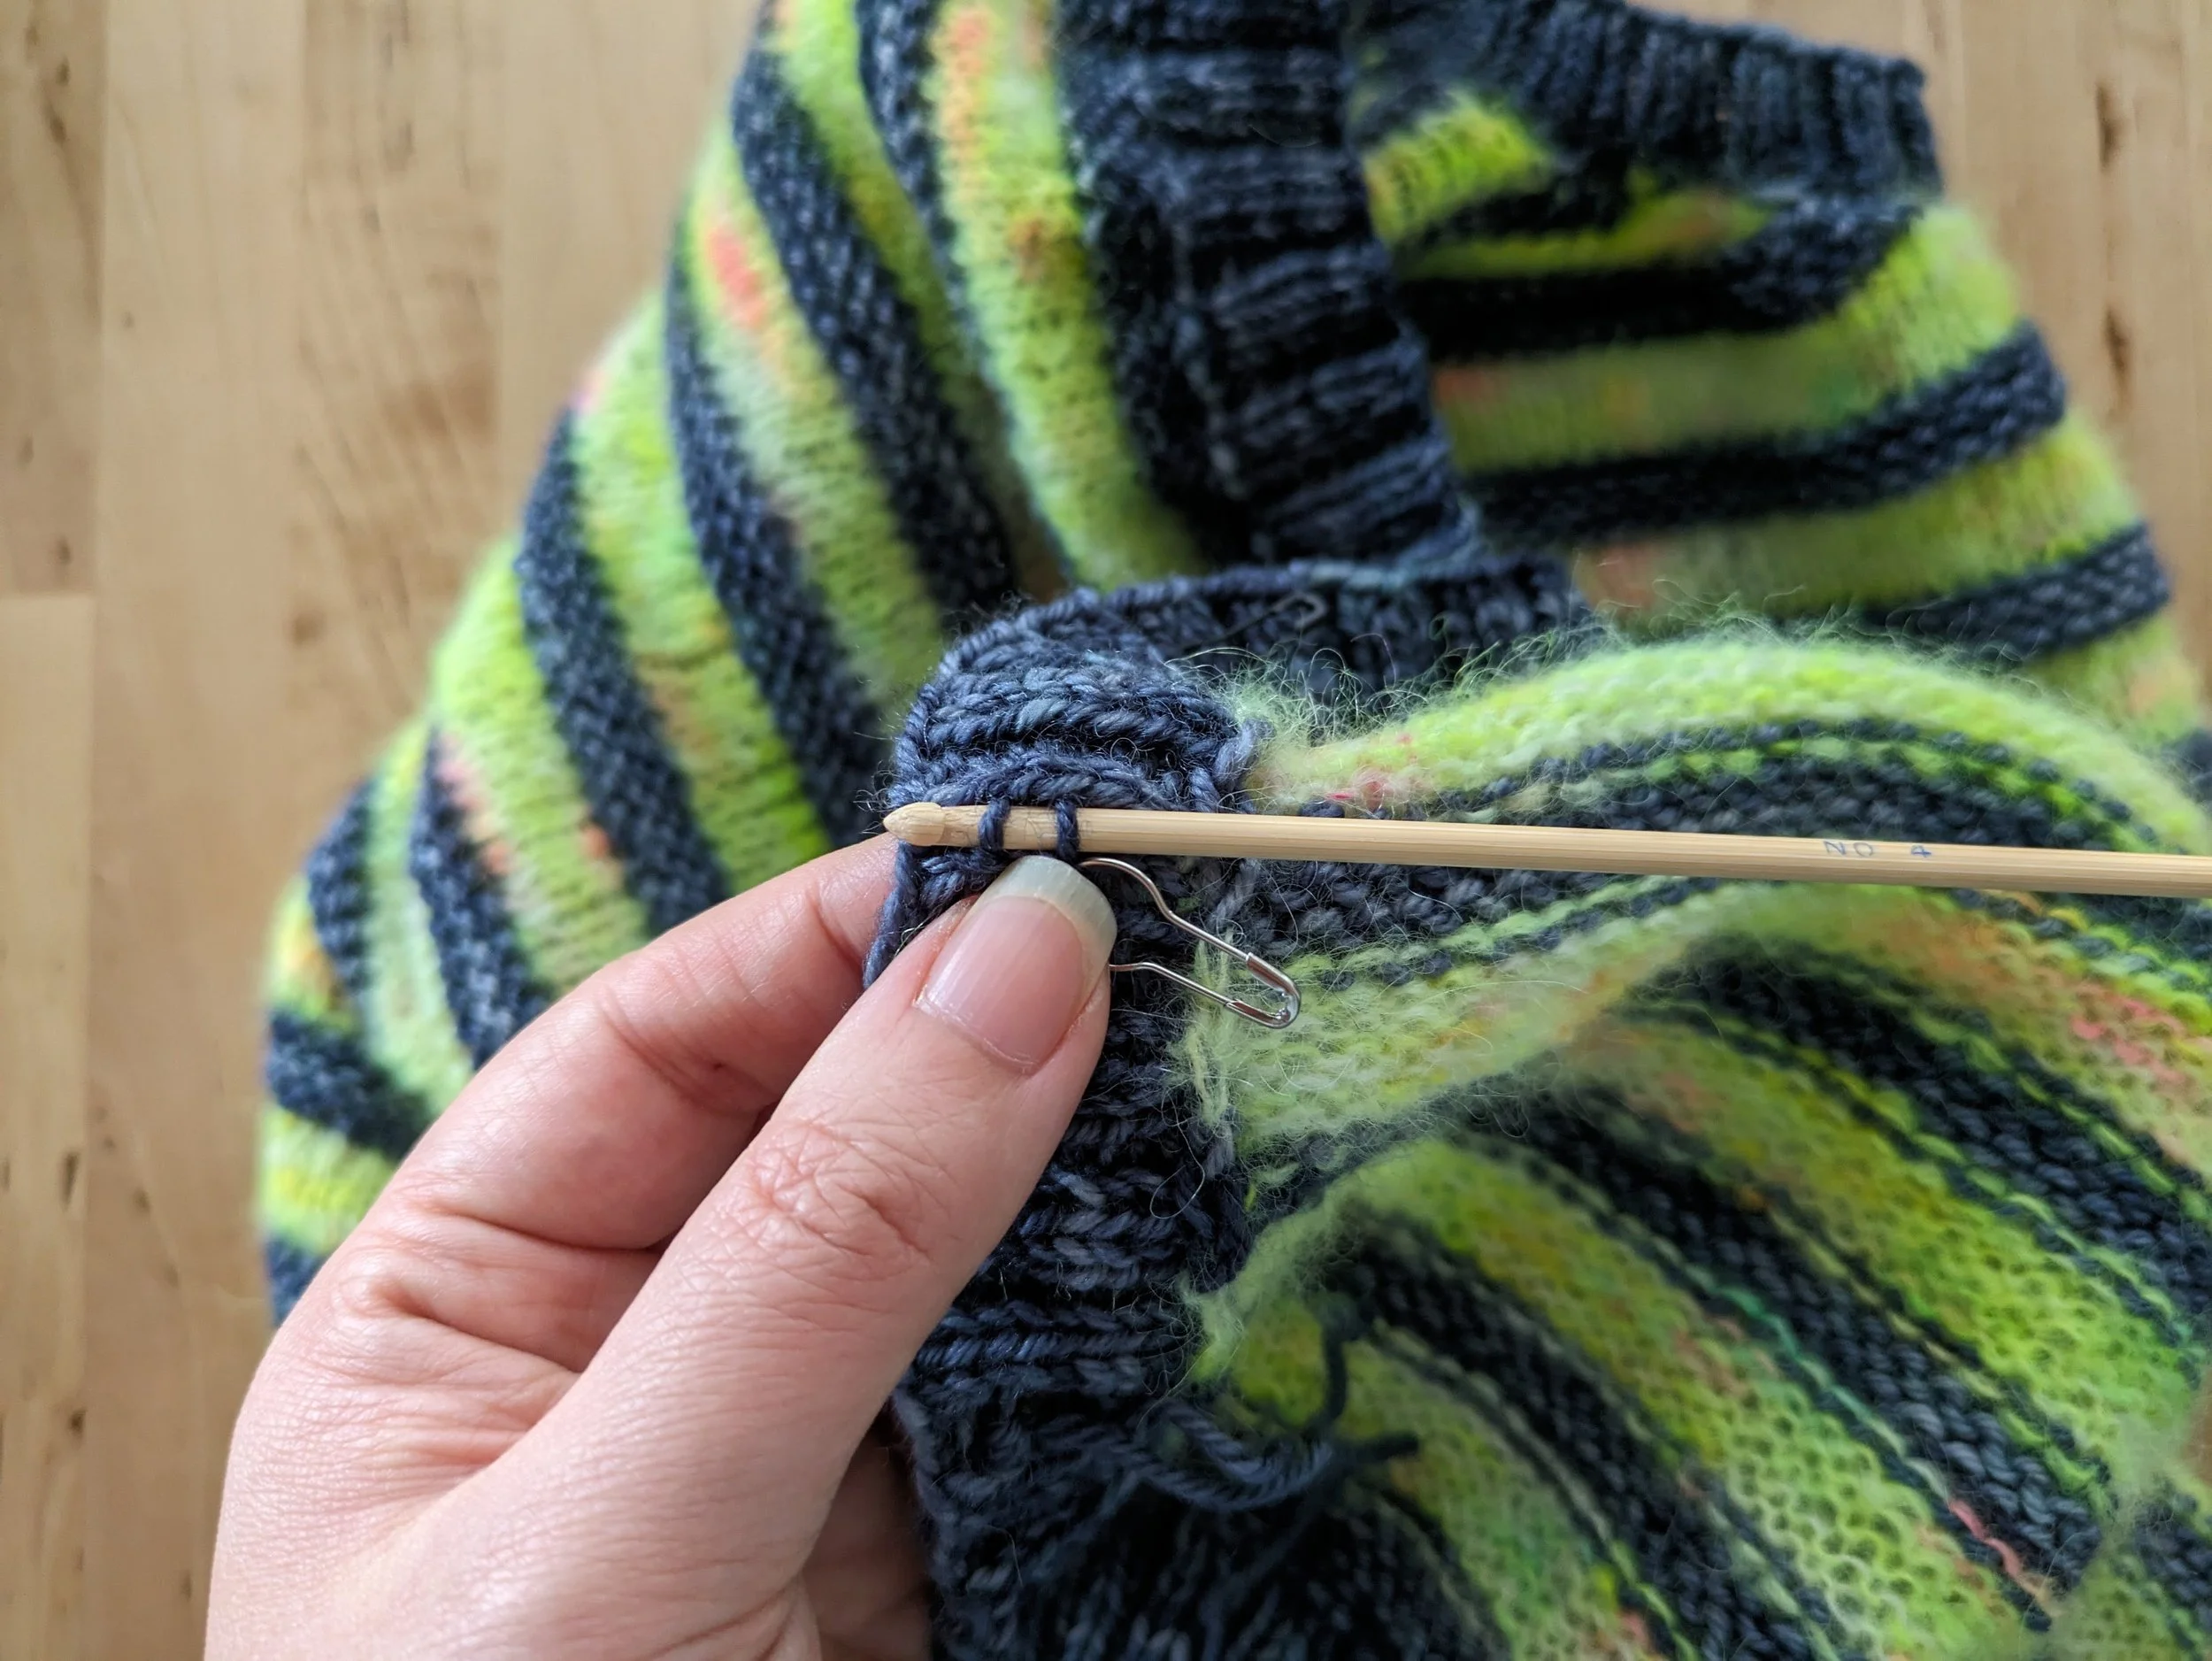
Step 3: ignore the first st that you just went under and find the very next st after that. Place your crochet hook under that one, as well. This is to hold the sts in place while you find your tapestry needle and scrap yarn. You will be pinning this into place to hold the buttonhole open.
NOTE: At this point, I invite you to pin these sts together with a removable st marker and repeat for the other side. Then take your button and slip it through that opening. You want to have an opening where you can comfortably slide your button through, but not so easily that your button may just fall through. If you find that your hole is too small still, try repeating Step 2 by “laddering” one more st up. Or else try wiggling the space wider. There are limitations to the size buttonhole you can create with this technique, but it does offer a good range of options.

Step 4: thread your scrap yarn or thread onto your tapestry needle and use it to capture the “live” sts on the crochet hook as seen above. I like to wrap these two sts a couple times to be sure they are well secured (see below pic for first wrapping). It is ok to remove the crochet hook. Leave a tail long enough to weave in for the end.


Step 5: at this point, as seen above, you will have the wrapped sts with 2 ends hanging on either side. You will weave in the end attached to the tapestry needle and work your way to the other side of the buttonhole, as you will repeat these same steps on the other side. My preference is to weave in the ends to both sides of this piece of scrap yarn to anchor the opening of the buttonhole and to secure the ends from coming loose, but you could also work a blanket st (this is the name of an embroidery st) around the buttonhole opening. I will talk more about that in a moment.

Step 6: repeat Steps 2-4 in the opposite direction to widen your buttonhole. By weaving the end of the yarn to the other side, you can used the same yarn and not need to weave in additional ends. The above picture is the final buttonhole from the front! Ta-da! :o)
Some general notes before I move on to the pics of how to work this method but the sts look like knit sts on the back side.
As mentioned earlier, since you are simply stretching the sts tighter, there are limitations to how big a buttonhole you can create. The buttons I am using are 3/8”/10mm large and fit extremely well without having to stretch the buttonhole when slipping them through. 0.5”/13mm buttons fit comfortably with a minimal stretch through these, and 0.75”/19mm buttons needed some coercing but did manage to fit through these as I did them.
And, of course, this is dependent also on yarn and needle size, so to reference: this is a very solid DK weight yarn and the buttonband was worked on Size US4/3.5mm needles.
As mentioned above, also, you can work a blanket st around the buttohole to firm it up (instead of weaving in the ends on the back). This would both be decorative (use a contrasting color!), and functional (especially in the case where the buttonhole actually needed to be made smaller in case of it stretching out). However, it also makes the buttonhole more rigid and less stretchy at all. So, if your button needs that stretch, I do not recommend applying this border. I am not skilled at embroidery, myself, (at least, yet…) so I prefer the appearance of the buttonholes without this. You can always apply this after that fact, as well.
Feel free to compare this to the YO Buttonhole and the Bind Off Buttonhole. And here’s a handy blog post that shows the difference between the 3 different options.
Working Buttonholes when the sts appear as Knit Sts (on the WS)


Step 1: find your placement marker and insert your crochet hook where you’d like to place your buttonhole. For this one, I decided I wanted my buttonhole between sts and not in the st. So, the crochet hook is placed next to the stitch that my st marker is indicating. Use the crochet hook to stretch out this space and begin creating your buttonhole.

Step 2: Step 2: pick a direction from the hole you created. In the pic above, I picked towards the edge of the buttonband. Place your crochet hook under the first 2 “sts” (I recognize since I’m going between sts, these aren’t technically sts, but the lines that would appear as sts). Pull the further/2nd st under the closer/1st st. This is a similar motion as if you were laddering a dropped st back up.
Step 3: ignore the first st that you just went under and find the very next st after that. Place your crochet hook under that one, as well. This is to hold the sts in place while you find your tapestry needle and scrap yarn. You will be pinning this into place to hold the buttonhole open.
NOTE: At this point, I invite you to pin these sts together with a removable st marker and repeat for the other side. Then take your button and slip it through that opening. You want to have an opening where you can comfortably slide your button through, but not so easily that your button may just fall through. If you find that your hole is too small still, try repeating Step 2 by “laddering” one more st up. Or else try wiggling the space wider. There are limitations to the size buttonhole you can create with this technique, but it does offer a good range of options.

Step 4: thread your scrap yarn or thread onto your tapestry needle and use it to capture the “live” sts on the crochet hook as seen above. I like to wrap these two sts a couple times to be sure they are well secured (see below pic for first wrapping. It is ok to remove the crochet hook. Leave a tail long enough to weave in for the end.

I’m super sorry, but I forgot to take a pic of the buttonhole when only one side was finished, but here’s a pic of the finished buttohole as viewed from the front (pic below, middle buttohole/near my ring finger)!

With my buttons (3/8”/10mm) to demonstrate relative size.
I hope that this helps! <3

